
Omnissiahs blessings to one and all.
This is a quick and easy tutorial to achieve that dusty Mars base to make everyone’s favourite robots feel right at home.
If you have any questions, comments or feedback about the process then drop us a comment (binary is fine) and we will get back to you.
General thoughts…basing
All models I paint are for the table top so I look for a scheme that compliments the army, is relatively quick to make and robust enough to survive the rigours of travel! Admech and transport are a very touchy subject.
Another consideration is cost. GW texture paints are great, but they aren’t cheap and don’t go a long way. If you are running 3-4 Onagers with their whopping arse bases (you great big cheese head), you ideally don’t want to go through 3-4 pots of 5 quid texture paint. So although I use them occasionally, it will be sparingly alongside other cheaper products.
Mars…
My Ad-mech are FW Mars so although predictable I wanted them to be set on their home planet! Being such a bland landscape, I was wary that they could easily end up looking boring, so wanted to create plenty of texture and points of interest.
The Process…
The creation of these bases is ridiculously easy, looks effective and takes no time at all. It’s good fun and relatively inexpensive to boot.
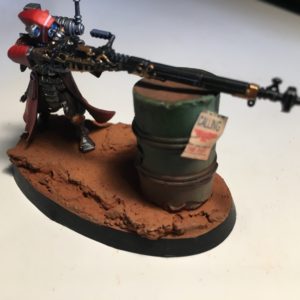
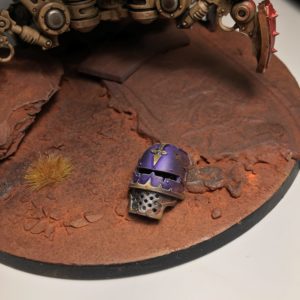
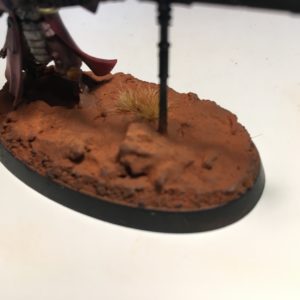
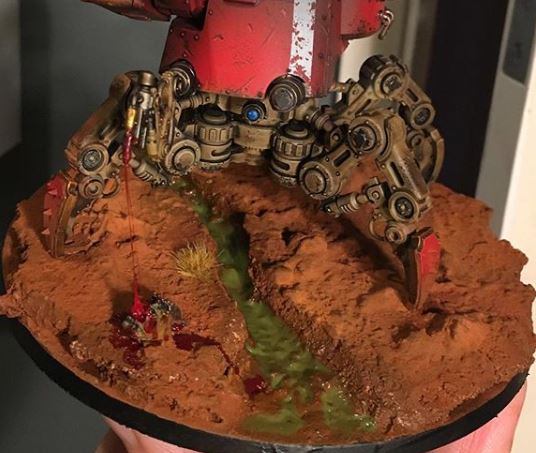
The process described below will give you the dusty barren red dust landscape look but you can obviously add rocks,barrels, toxic ooze, corpses etc to add a bit of zing. I’ve added some photos at the end of the blog to give you some ideas.
What will you need…
Not a great deal!
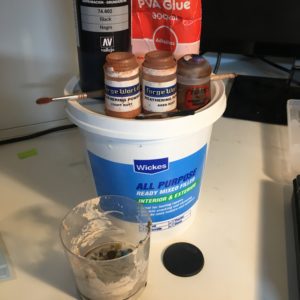
- PVA glue
- All purpose filler (any old tub of ready made filler will do)
- Sand
- Small stones/gravel
- Weathering powders (I use the FW set)
- A old mixing pot
- An old brush
- Paint: Black primer, GW Mournfang brown
If you base your models separately, first place your model on the empty base in its final position and using a pencil mark up where the feet will end up. The base I am doing here is just for the tutorial so I am skipping that step – but you get the idea. Basically you don’t want your 5 ton space robot balancing on a tiny peak or bit of gravel!
Add filler and PVA to your mixing pot (2:1) and mix thoroughly. Add sand and any small bits or gravel and keep mixing until you’ve got a thickish paste like consistency.
You want natural peaks when it’s applied to the base so don’t want it too runny or the PVA will settle flat. If in doubt chuck in more filler and sand!
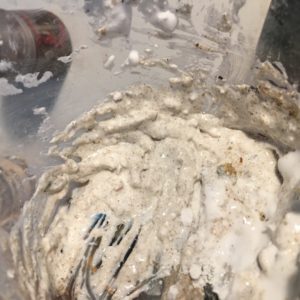
Use the old brush to apply to the base, dabbing on as thick as desired rather than brushing on to create some natural peaks.
I usually go for about 2mm deep coverage and then wipe my finger around the edge of the base while it’s still wet to neaten up a bit. Don’t forget to work around the pencil marks of where your models feet will be the best you can.
Once you’ve got as much of the base mixture on as required sprinkle a little more sand on sporadically before it dries to add further texture.

As I’m creating this base specifically for the tutorial I didn’t leave the space for feet, but you get the idea!
The mixture will dry rock solid (no pun intended) so don’t forget to rinse out the pot and brush! If you want larger rocks or other points of interest then press these into the paste before it dries.

As an optional step, once completely dry, I give my bases a quick blast of hairspray to seal everything in.
Now she’s ready for paint. Undercoat in any black. I use an air brush but only because it’s quicker – the end effect will be exactly the same if you use an old brush.
Leave to dry and then paint the whole base in Mournfang brown.

If you added any large rocks during the earlier steps, now is the time to get them painted. A quick and easy way is to start with a dark grey. Let dry and then dry brush with a lighter grey and so on until you get the effect you want.
Next up is the fun bit – applying the pigments!
Fingers tip: Be really careful when using FW weathering powers! The pigment can get everywhere and can easily stain surfaces and clothes etc.
The first step is cover the whole base in FW Aged rust weathering powder. You don’t want to go overboard, but have enough applied so you can’t see any of the mournfang brown showing through. I sort of rub it on rather than sprinkling. You can cover the rocks with pigment too (does mars have wind?!) or leave them exposed depending on the look you want.

Your base surface should have natural peaks and troughs so the next step is to apply FW Light rust to the the highest points to give a feeling of depth.Try not to overpower the dark rust with the light rust too much as you want to keep that contrast.

Once your model is glued in place, you can lightly dust the lower section (feet, ankles etc) in aged rust to blend the model into the base. I usually use a very small amount on cloak recesses too.
That’s it and minus drying time took about 5 mins to do! On larger bases you can combine this process with texture paint, cork board etc for variation.
You are probably now thinking “Fingers you mad bastard – surely you need to seal the powder to stop it rubbing off turn 1?!” I say to you “No sir. No you do not.”
I’ve tried pretty much everything but always end up losing that dusty look I wanted. So I just apply the powders, blow off the excess and bobs your uncle. You will lose some of the powder over time as you use your models, but if anything I’ve found that my AdMech look better as the highest points ware away to the mournfang brown. The pictures here are after many months of use and being transported allnover the place – so they have held up pretty well. If anyone has a good tip for sealing while retaining the dusty feel then let me know!
For the Omnissiah!
Fingers
https://www.instagram.com/rapidfire_wargaming/